
Unlock the Mystery: Why Your Business stationery isn’t Coming Out Perfectly Printed!

At our core, we take pride in producing top-tier prints for all our clients. However, the quality of our prints depends greatly on the artwork provided. While some prefer to design their own artwork to save on costs, this can sometimes lead to issues.
To help you achieve that perfect print finish, we’ve compiled some essential tips.
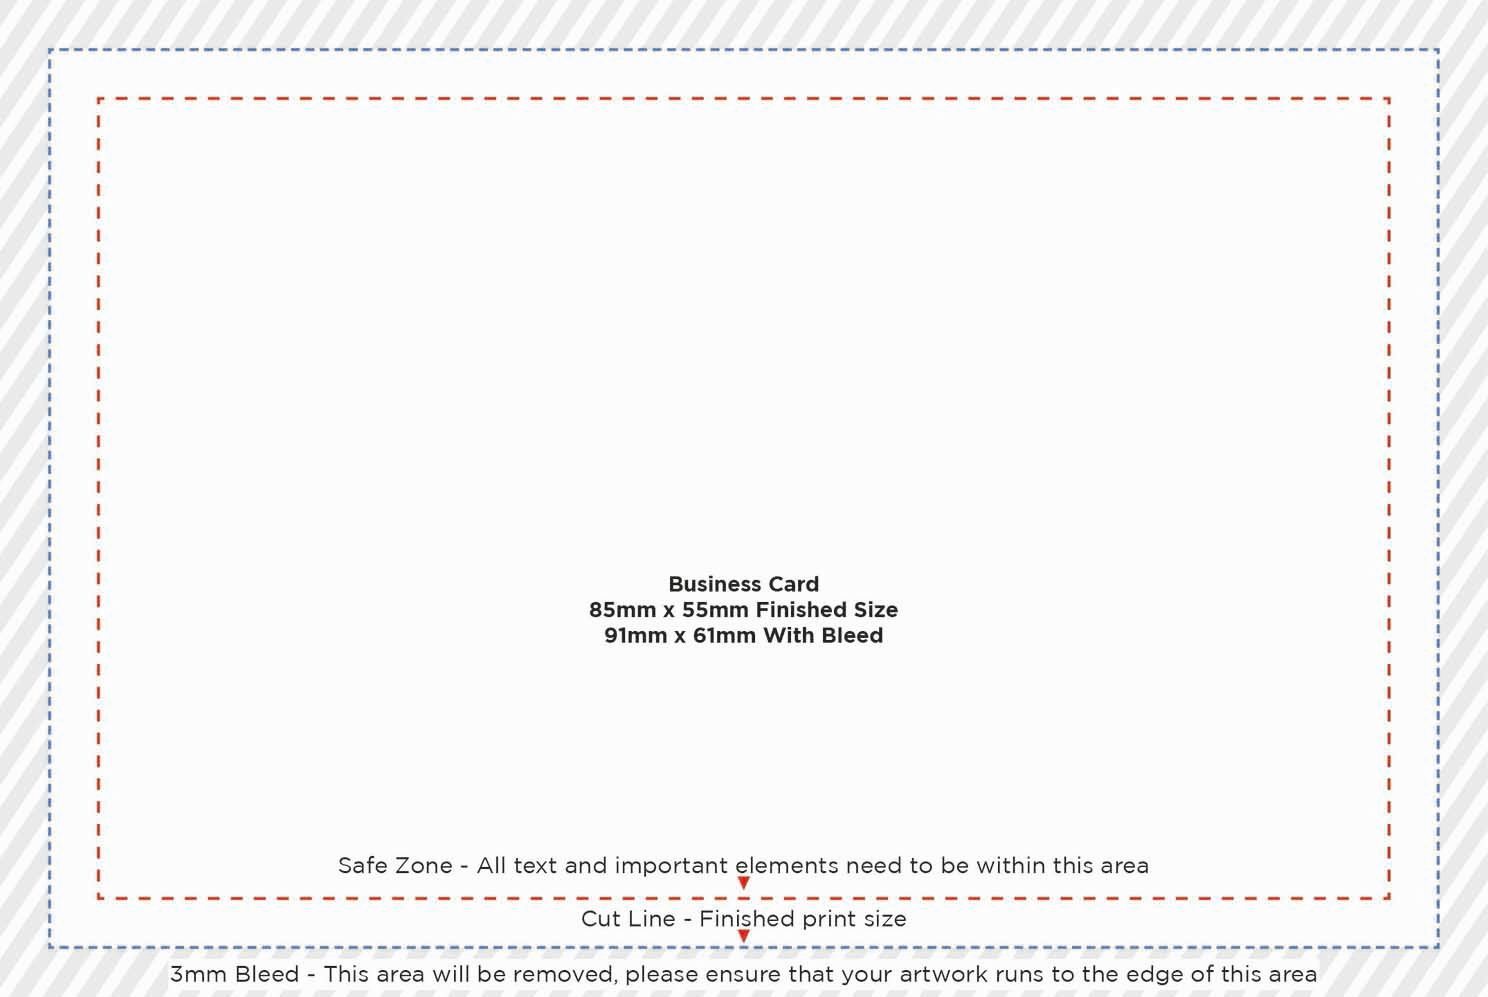
Ensure a Proper Bleed
To avoid an unsightly white border around your artwork, ensure a 3mm bleed on each edge. The only exception is our PVC banners, which require a 25mm bleed on each edge.
Maintain a Safe Zone
To ensure no important information gets cut off during printing, keep a 3mm safe zone from the finished edge on each side. This is on top of the 3mm bleed
For specific products, larger safe zones are necessary:
- Perfect Bound Booklets: 7mm safe zone on each edge
- PVC Banners: 36mm safe zone on each edge
- Calendars: 9mm safe zone along the binding edge, 3mm on all other edges.
Design in the Right Colour Format
Always design your artwork in CMYK. If your documents are in RGB, we will automatically convert them to CMYK. The RGB spectrum is much larger than CMYK, making it tricky to keep consistent print quality in RGB. Variations can occur between different printing presses, even if they are identical models. CMYK ensures a high standard of print quality and eliminates colour variation during the print process..
Most major design programmes allow you to create a canvas in CMYK. To set up your project correctly, adjust the following settings in your design software:
Embed Your Fonts
To ensure your fonts remain consistent when opened on different computers, embed them when converting your file to a PDF. This will package the fonts with the document information, ensuring it looks exactly as you designed.
Handle Transparency Correctly
Incorrect transparency settings in PDFs can cause printing issues. Without proper transparency, top-layer objects may block objects on lower layers. Avoid this by flattening layers within your PDF to ensure all layers are correctly interpreted.
Use the Right Image Resolution
For clear, sharp images, use a resolution of 300dpi. Images from the internet typically have a resolution of only 72dpi, which can result in blurring or pixilation when printed.

Sending Your Artwork
The best file format to send us is PDF. Please avoid using Microsoft Office programs such as PowerPoint, Word, and Publisher, as they are incompatible with our proofing tools.
Ensure your file is smaller than 200MB. Before sending, zoom in on your image by 300-400% to get a good idea of how it will look when printed.
When it comes to printing on paper, the tips we've provided will guide you to perfection.
If you have any questions or need assistance in creating the perfect artwork, feel free to enquire. Visit us at our website or give us a call on 0118 437 4515.
We’re here to help you achieve flawless prints every time!
However, printing on promotional products like mugs and pens is a completely different challenge. If you're embarking on a branding exercise, make sure your graphic designer provides you with a vector file.
At Summers Print & Promotion, we're dedicated to crafting success for you and your business!
.
